Wednesday, March 20, 2013

Cream Cheese Coffee Cake

Business on the outside, party on the inside

I feel like I don’t need to say anything about this because the pictures say enough, but since I know you are reading this for my witty commentary I will grace you with my notes and banter.

This is another one of those cakes that weighs an uncomfortable amount of weight. Like the uncomfortable amount of weight where you eat one slice and automatically are like, “Hmmm..I just put one whole pound of food into my body which means my body is now one pound heavier.” This is a concerning feeling. Unfortunately, the best things in life are made with butter. And LOTS of it.

I can’t blame anyone but myself for making 300lb cakes because I don’t know when to stop. This recipe was originally just a cinnamon swirl cake. In the beginning there was cinnamon and cake. And then Meg said let there be streusel. And so there was. And then Meg said let there be cream cheese. And so there was. And then Meg looked upon her work and smiled. And gained five pounds. Enjoy!

*Please note that my rash last minute decisions call for me to make up my own recipes where I don’t use exact measurements. I have done my best to estimate what I used exactly to make this cake unnecessarily over the top J


INGREDIENTS: FOR THE CAKE
1 cup butter p
2 3/4 cups white sugar
4 eggs
2 teaspoons baking powder
1 teaspoon baking soda
1 teaspoon salt
2 cups sour cream
2 teaspoons vanilla extract
4 cups all-purpose flour
DIRECTIONS:
1.
Preheat oven to 350 degrees F. Lightly grease one bundt pan.
2.
In a large mixing bowl cream together the butter and 2 cups of the sugar until fluffy. Add the vanilla and the eggs one at time beating mixture well after each egg.
3.
Combine flour with baking powder and baking soda. Add alternately with sour cream to egg mixture. Beating just enough after each addition to keep batter smooth.
4.
Spoon ½ of the batter into the pan. Add cream cheese mixture. Pour the rest of the batter over the cream cheese. Sprinkle with the streusel.
5.
Bake at 350 degrees F for 30 minutes or until center is done. Let cake cool in pan for 10 minutes then remove pan and let cake continue cooling on a wire rack.


You don't want to over-mix your batter or your cake will be chewy. Keep your OCD tame and embrace the flour bombs!


INGREDIENTS:FOR THE STREUSEL
1/2 cup butter (slightly softened)
1 cup brown sugar
½ cup flour
2 tablespoons ground cinnamon
DIRECTIONS:
1.
Cut the butter into small cubes (to make easier to crumble) and add to a small bowl
2.
Add brown sugar, cinnamon, and flour to butter cubes. Mix carefully with your hands or a dough mixer until ingredients are thoroughly combined. The mixture should be crumbly but hold shape if squeezed in your hand. Sprinkle on top of the second layer of the batter.
.
Call me Drake 


INGREDIENTS: FOR THE CREAM CHEESE MIXTURE
1 package of cream cheese softened
1 cup powdered sugar
1 tablespoon vanilla
DIRECTIONS:
1.
Cream all the ingredients with a hand mixer until light and fluffy.      

                
Cream cheese goodness!
     
                                                                                     
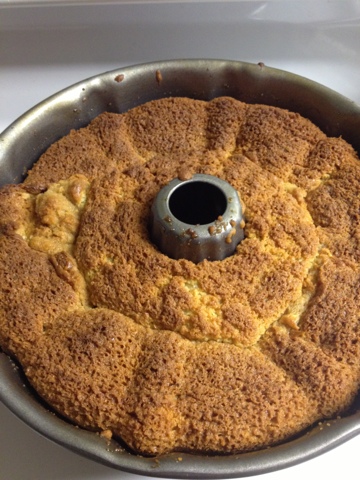
I promise this isn't burnt.


White Chocolate Cheesecake teaser!!


I guess the apple doesn't fall far from the tree. My mom made this white chocolate cheesecake a few weeks ago for Anthony's birthday per my request (as Anthony likes to remind me, this is my world and he is just living in it :0)   ) I don't even have the recipe for you and I am not sure if I would even share it if I did....just wanted to post this picture to make you drool. And yes-it was as good as it looks. THANKS MOM!! Bravo bravo we want an encore!

Friday, March 8, 2013

Quick Italian bread and Spaghetti Squash


I have always wanted to learn how to make bread from scratch. I have used a bread making machine several times and while it is of course delicious, I don’t ever feel accomplished that I made it. It also is certainly not as fulfilling to throw ingredients in a bowl and forget about it than to get your hands all dirty and sticky in flour and warm dough. My aversion to make bread is always the timing of it. I am very impulsive with my cravings and when I want something, I want it now. When I found this recipe for a homemade Italian bread that only took an hour from start to finish I was shocked at how something could be so enticing and plausible and leaving me to fulfill my fantasy of living in the 1950’s all at once. I got to work on this right away and figured it would complement the spaghetti squash that had been sitting on my counter for two weeks waiting to be made.

So now that I have hyped everyone up with my excitement let me say that when something is too good to be true it usually is…and this bread recipe might fall under that category. I was a little weary about the recipe taking only an hour from start to finish because my idea of baking bread is smelling the yeasty air of an Italian bakery from down the street as the bread rises in the warm sun. (In my mind I live in Venice and am in love with a handsome  Italian man named…..Anthony…ahh la bella vita!) In reality, this bread was just okay. The bread came out very dense and heavy – which is a good thing if that is what you prefer, but I was looking for a more soft and Wonderbread  airy texture. I also think the recipe may have been affected since I chose to use whole wheat flour rather than all-purpose. This added a gritty texture which was delicious but I felt the bread as a whole was a bit dry. I didn’t actually ever get the chance to toast the bread since I gave it away but I think if it had been I would have probably enjoyed it more.

 Overall, this is certainly a nice little recipe to have in the bag if you ever want your house to smell like an Italian villa or to satisfy those carb cravings in a pinch. I think next time I will try a bread recipe that takes a bit longer to prepare because everything that is good is always slow to make J

Quick Italian Bread

  • 2 1/2 Cups Warm Water (this should be warm..NOT HOT OR YOU WILL KILL THE YEAST!)
  • 2 tbsp Yeast
  • 2 tbsp Sugar
  • 1 tsp Salt
  • 3 tbsp Oil
  • 5 1/2 -6 Cups Flour (I used whole wheat)
First:  Add yeast and then sprinkle the sugar over the 2 1/2 cups of water.  Let it sit for about five minutes until you see the yeast get all bubbly on top.

Next:  Stir in the salt, oil, and flour.

Then:  Knead the dough for a few minutes until it is smooth and pulls away from the bowl.

Then cover your bowl with a warm wet towel and let the dough sit for about 15 minutes.

Next, divide the dough into two long loaves (rolling like a jelly roll and tucking in the ends). Place both loaves side by side on a greased cookie sheet. Then take a knife and slash the tops of each loaf diagonally. Allow the loaves to sit for a few minutes while you preheat your oven to 375. Bake for 30-35 minutes until golden brown.


I also thought I would add spaghetti squash in this blog since it isn't worthy of its own post. Basically - I just wanted to share that I was really excited that spaghetti squash is already spaghetti'ed. I always thought you had to bake it and then shred it with a fork to get the noodle like meat of it but IT ALREADY COMES THAT WAY! I had more fun taking it out of the squash than actually eating it since I undercooked it and it was crunchy like a raw potato...but none the less always an easy way to sneak those veggies in. And for those of you who are unfamiliar how to prepare, you just cut the squash down the middle, remove the seeds, and bake face down on an oiled cookie sheet at 350 degrees for about an hour. 


Tuesday, March 5, 2013

Chocolate Chip Cupcakes

Potlucks always stress me out because I am so indecisive. I consider myself to be a pregnant lady at all times because there is just no way to guess what I am going to crave in the next five minutes. You are probably pretty safe with anything rhyming with shmocolate though.

But I digress... We do a potluck here and there at work and last time I made Paula Deen's banana pudding which is SO. GOOD.  I didn't want to bring in the same recipe again (even though I wish I did because I had lots of people ask me about it....*blushing*) so I went with a pretty easy request for yellow cake with chocolate frosting from one of my co-workers. I also was craving coconut rice pudding for whatever in god's name reason so I made a huge pot of that too. Which I of course accidentally left at home. Also I made all of these things at 11:30 at night. See below what happens when you cook tired..

Just roasting my oven mitts on high! 


The cupcakes are simple yellow boxed cake mix but the best part is the frosting. This frosting is my go-to frosting recipe. It is beyond delicious and beyond terrible for you! This was my first time making it chocolate since I usually prefer vanilla buttercream frosting and it actually came out pretty good. I still prefer the original buttercream though! Also a trick I use when making box cupcakes is to fill the muffin cups up to pretty close to the top with batter. Usually they say one box makes like 24 cupcakes but they end up being flat and your cake to frosting ratio is thrown way off. I'd say when I make a box of cupcakes I only produce about 15 or so. This makes it seem like I am eating less cupcakes when 15 are gone instead of 24. I should also note that when I make my frosting I really just kind of wing it. I have included the best estimate of what an actual handwritten recipe will look like. And trust me...you will want to remember this one. You will never buy Duncan Hines again!


                  BUTTERCREAM FROSTING

2 sticks of butter softened (NOT MELTED!)
3 1/2 cups powdered sugar
1 teaspoon vanilla
1/2 teaspoon salt
2 teaspoons of milk or heavy cream

Cream the butter. Add the powdered sugar, salt, and vanilla. Cream until well mixed. Beat in the milk. You may need more or less depending on the consistency of the frosting. You ideally want your frosting to be thick and heavy so that when you stick a spoon straight up in it, it does not lean.

To make this frosting chocolate I added about 1/2 cup cocoa powder. You could also add different flavors like almond extract, lemon extract, mint extract etc. I find that the rich buttery taste is best left alone though!


Chocolate Almond Overnight Oats

So sorry I have been a bad blogger lately. HOW AM I GOING TO BE FAMOUS ONLY POSTING ONCE A WEEK!!?

Now that I have that off my chest...this was a recipe I sort of threw together last minute. I guess I visited Pinterest too many times that day because they have 94872984739 recipes for overnight oats. Essentially, preparing oats by soaking them in milk overnight helps the oats retain much of the nutritional value that is lost when cooking them. I just really hate the taste of instant oatmeal packets and am thrilled about having anything involving chocolate for breakfast so naturally this was a perfect fit.


I have to admit that I do not really have a recipe for this breakfast idea because everything I did was eyeballed. Basically, the simple recipe for this would be to put a portion of instant oats into a cup and pour enough milk over the oats to almost cover them. I felt that I may have added too much milk because it was a little watery so next time I would add less for my own taste preference since I like my oatmeal thick. Then, I added about a tablespoon of almonds, a tablespoon of mini chocolate chips, a teaspoon of cocoa powder, and a small packet of stevia. Leave the oats in the refrigerator overnight and wa-laaa..breakfast is ready when you are running out the door in the morning. (PLUS you make it in a cup and this fits in your cupholder which should be a requirement for any breakfast food)
I admit next time I would add coconut to this and probably use a chocolate almond milk or something to give it a bit more flavor. It was a very dessert like treat that is relatively healthy which kills two birds with one stone. The good thing about these oats is that they are incredibly versatile. You could really add just about anything to these. I have seen several recipes for pumpkin, maple, peanut butter and jelly, etc..Certainly worth looking into!

Monday, February 25, 2013

Triple Chocolate Cake


So remember how I admitted I love box cake? Here is a recipe that takes box cake to the next level and will trick people into thinking that you made it from scratch. I have actually made this one before so I knew how delicious it was. Sometimes I like experimenting with healthy alternative recipes because I like to have my cake and eat it too. As in, I want to be skinny but still eat cake. This is unfortunately not one of those recipes. No matter which way you spin it…greek yogurt will never produce the same dense,thick, and fudgy chocolate cake that I want. (PS I don’t know how to spell fudgy.Fudgey? MS Word keeps telling me they are both wrong. I hate misspelled words and that squiggly red line is really ruining my day but I can’t use any other word to describe it!)

This cake is best made in a bundt pan but I could also see this being made in a bread loaf pan. I suggest this only because there is so much flavor to the cake, you will not want to frost it. Bundt pans make pretty cakes and I feel professional when I have good presentation instead of just taking bites out of the pan with a plastic fork. This is a very rich and heavy cakes so don’t be surprised when you take it out of the oven and it feels like you are picking up a small child. Speaking of children…if you do want to add something sweet to the cake, I suggest using warm raspberry jelly. I actually learned this trick from my friend who had a cholic baby so she could not have dairy. She used to use heated jelly instead of frosting on cakes and breads and it was surprisingly tasty. Except eating dairy free food all the time is certainly not tasty. Remind me again to never have kids please!


INGREDIENTS:
1 (18.25 ounce) box devil's food
cake mix
1 (5.9 ounce) package instant chocolate
pudding mix
1 cup sour cream
1 cup vegetable oil
4 eggs
1/2 cup warm water
2 cups mini semisweet chocolate chips
DIRECTIONS:
1.Preheat oven to 350 degrees F 
2.In a large bowl, mix together the cake and pudding mixes, sour cream, oil, beaten eggs and water. Stir in the chocolate chips and pour batter into a well greased 12 cup bundt pan.
3.Bake for 40 minutes, or until top is springy to the touch and a wooden toothpick inserted comes out clean. Cool the cake thoroughly before removing from the pan.


Friday, February 22, 2013

Easy Chili


Git in my mouthhhh

So not much to say about this but it was the lowest maintenance thing I could make in a rush. I feel like I never have the time of day to actually cook and bake as much as I would really like to. I’m pretty much a single mom over here – I cook and clean. Because of that, I like cooking things that produce big portions so I can eat them for 3 days straight. It gets a little unrefined when I eat things like chili for breakfast but when in Rome…

Anyways, this is the simplest chili recipe in the world. It is pretty mild for a chili and that is how I like it but obviously you can doctor it up with more heat if needed. I also use cannellini beans instead of red kidney beans out of preference but really any variety of beans would do.  It is  also the most basic chili could ever be but I appreciate simple so please don’t judge me for using a packet of spice mix from CVS. What's a Barbie to do? You could really take this recipe to the next level by adding chopped onions, peppers, sausage, and a variety of beans...but why fix what isn't broken?


INGREDIENTS:
1 lb ground beef
1 large can crushed tomatoes
1/2 teaspoon minced garlic
1 cup water
1 packet of chili seasoning
1 can cannellini beans, rinsed


DIRECTIONS:
1.In a large saucepan cook ground beef completely. Add 1 cup of water and packet of chili seasoning. Simmer until the sauce thickens. 
2.
3.
In a separate saucepan on low heat mix the tomatoes, rinsed beans, and garlic.
Add the ground beef to the saucepan. Simmer on low for 30 minutes with a cover on the pan.